Wedding Wednesday: Easy Tulle String Lights DIY

This project is super super easy with a lot of potential uses. I first made these in white-on-white as a wedding decoration, but they also make adorable additions to your holiday decor or even a child’s room. If you want to use these on a christmas tree, I recommend using 2 strips together for each light instead of just one. That way the color really stands out against the dark green of the tree.

Material

  • string lights (white wire type is best, unless you want to put these on your tree, then use green) $1-3 (I bought a 5ft strand from the Dollar Tree for $1)
  • roll of 6″ tulle (you can find these at crafts stores in either the fabric or wedding section) $2-5
  • scissors

    Project Time: 15 mins (depends on the length of your strand of lights)
    Approximate Cost: $3-8

How to Make a Favor Folder

Great for DIY wedding favors!

Making Mayhem

Project Time: 10 mins each
Approximate Cost: <$1/ea (not including the actual treat, IE the soap)
Project Yield: You’ll get two favor folders of the size shown (3″ x 3 1/8″ folded) from each 8.5×11″ standard sheet of paper.

For pdf project pattern, click here.

[Read More…]

View original post

Tuesday Tip: Crystal Wedding Hairpin Hack

Looking for that extra little touch for you updo? Here’s a little tip for you that is cheap, takes zero crafty skills, and is oh-so-gorgeous!

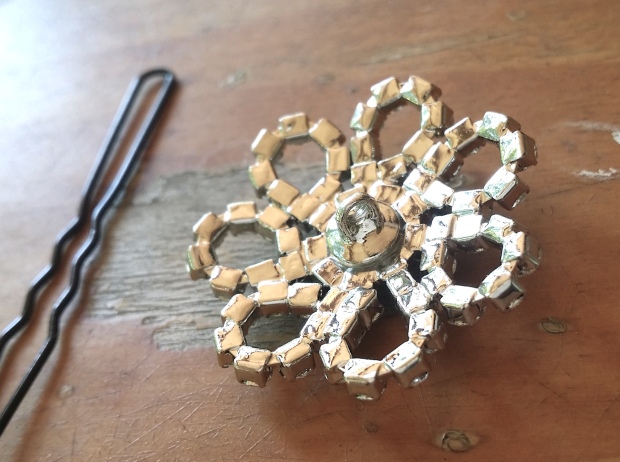
All you need is a hairpin and a crystal (or any other type) of decorative button. Yes, button.

You can find these in fabric stores or inside craft stores in the sewing section. Usually there is a revolving stand with novelty buttons. While many of these are colorful, plastic, and/or tacky, you can find some really pretty crystal, pearl, and rhinestone ones.

20140825_135109

See that little loop/hole on the back? Just take your hair pin and slide it through there.

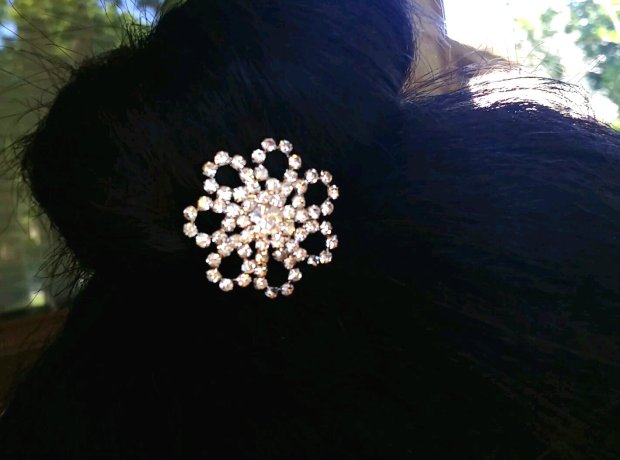
And there you have  it…

Picture_000026


Here are some examples of other buttons you could use. These are not our photos, they are from the Hobby Lobby website.  Search “shank buttons.”


Weekly Inspiration For Your Wedding Reception: Frozen-Fruit Punch

Here’s a great idea that will have your guests impressed and feeling refreshed!

You will need fruit that can be punched out with a cookie cutter. Good examples of fruits to use would be pineapple, cantaloupe or watermelon. We are using watermelon in our example.

  1. Slice fruit into pieces that can be easily punched with a cutter of your choice. A heart shape cutter would be great for a wedding.
  2. Once you have your fruit cut out place it in your freezer.
  3. You can choose any drink but, for looks, a clear or light colored option will be best. For non-alcoholic drinks you can use flavored club soda, sprite, or clear fruit punch (Wal-Mart has great clear fruit punch!). Flavored vodka or rums would be a good options for the party crowd. 😉
  4. Place one or two shapes per glass, and to add a little flair drop a few frozen blue berries in also.
  5. You can keep glasses chilled until you are ready to serve drinks in them. This will save you time and guests can pick what they want to be served as they are ready.


DIY Message in a Bottle “Guestbook” : Wishes for the Couple’s First Year

Looking for a guestbook idea that breaks a bit from the traditional? Check out this easy DIY “message in a bottle” guestbook. Perfect for a beach or nautical themed wedding!

For this little project, you’ll need:

  • glass bottle with cork
  • sheets of paper for the notes (cut to your own sizing specs)
  • jump rings (found at any craft store in the jewelry section) (about 10mm in size)
  • ribbon
  • instruction tag / keepsake tag
  • Pre-roll all the note sheets and secure them with one jump ring each. We recommend this so that your guests don’t have to spend time trying to get the sheets rolled up once they’ve written their note. To display, lay out all the pre-rolled notes on a table beside your bottle. The guests will pick one up, slide the ring off, write a note, replace the ring, place note in bottle. Don’t forget to include a pen or two!
  • We used jump rings, as opposed to tying with string or ribbon, just to make it easier on everyone involved.
  • Our tag is a combination instructional tag with keepsake tag on the back side.  Leave instructional side facing out during your reception, then once you take it home, you can flip the tag to show your names and wedding date, for example.